
Fabric Flower Tutorial
In case you're wondering, Blogger has been having a FEW issues lately and for some odd reason, my Inspiring Thursday Party from last week ended up on my homepage again. I don't get it. But just wanted to let you all know, this is last weeks party. Do come back this Thursday to link up to this week's
. Looking forward to seeing your greatness!!
Onto this tutorial:
You all remember my
right? Do you remember the fabric flowers on it? Well, today I'm showing you how I made those fabric flowers. They are super easy to make!

First cut five round circles out of material, making each one a little bigger than the next.

I didn't want the circles to be perfect, so I intentionally cut them without a pattern.
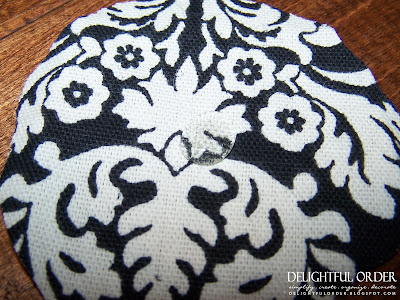
Beginning with the smallest circle, add a dot of hot-glue in the middle.

Pinch the back of the material.

Forming it to the shape you like.
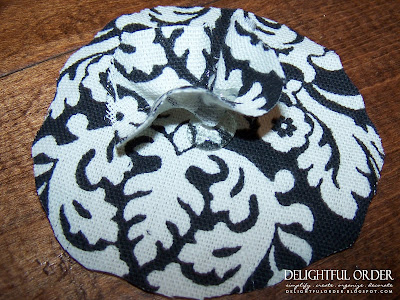
Next, add a dot of hot-glue to the circle that's the next size larger.

Place the smaller circle on top of the hot-glue (before it dries, of course.)

Pinching the back and forming it the way you like.
Repeat, until you've used all the circles.

This is what the back of the flower will look like.
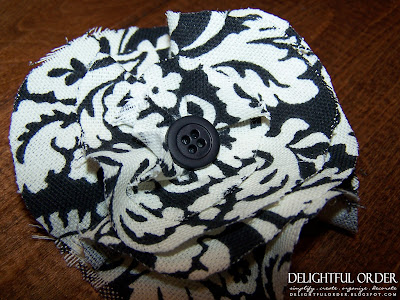
Hot-glue a button in the middle
Hot-glue a rhinestone in the middle of the button, fray the edges of your material a bit and that's it!
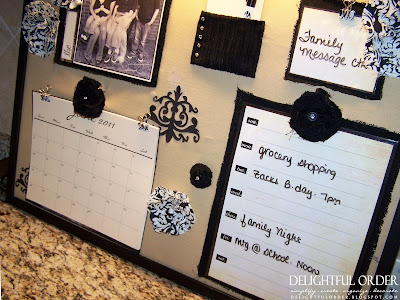
I hot-glued my flowers to my
.
Hot-glue them to headbands, clips for the hair or add a safety pin to the back and wear them on your shirt, scarf, purse etc.
Have a truly BLESSED day!
DaNita